Sephiria Builds: Four Routes That Clear All 6 Chapters
A Sephiria build is three decisions that have to agree with each other: a weapon upgrade line, a talent spread, and a combo plan for what goes in the bag. Builds fail at chapter boundaries almost always because two of the three are pulling in different directions.
Below are four routes that players have actually taken to a clear. Each is attributed — none of them is our invention, and none of them is a tier list.
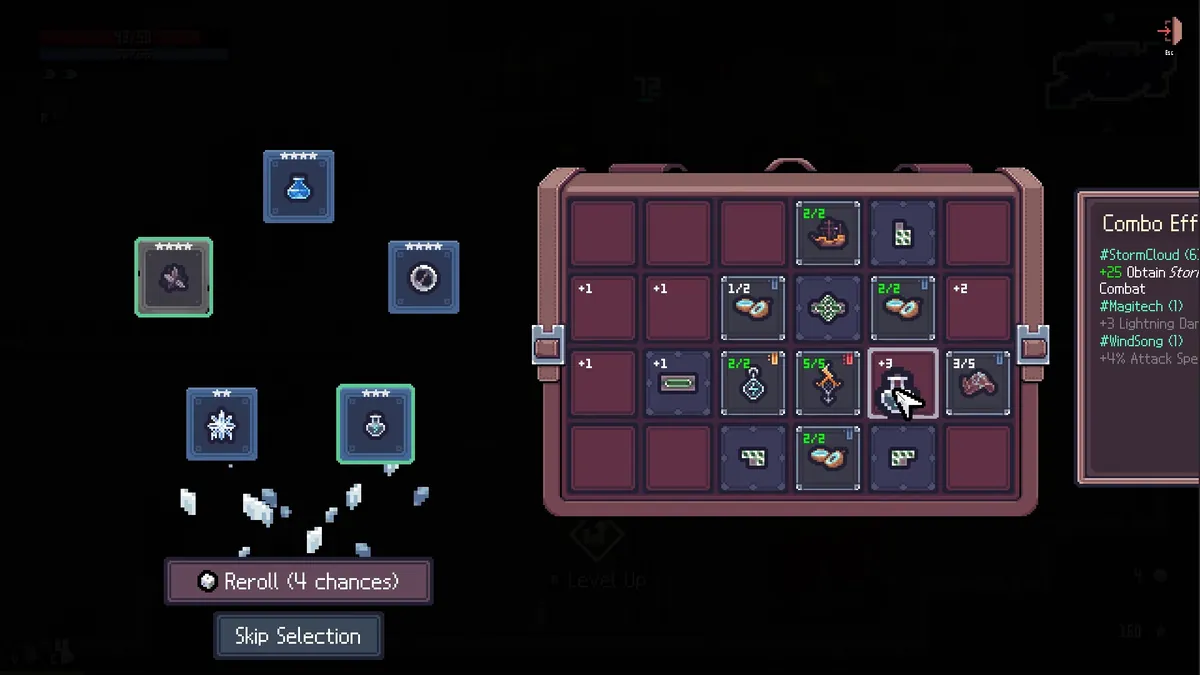
1. Storm Cloud Great Sword — the easy clear
The one the community recommends to anyone stuck. Take the Lightning Greatsword line, pick up the Storm Cloud upgrade, and rush every Anvil you find.
The plan in the words of the player who described it: "just spam your special attack and let the stormcloud win the game for you." Another player is blunter — "You can AFK all areas. Mobs die before they can attack. Really boring build."
- Weapon: Great Sword → Lightning Greatsword "E2G" → "E3G" (3 Storm Cloud stacks every 5 attacks) or "S3G" (Shock on Direct Attack). S3G's Electrocution damage went from 20% to 33% in 1.0.19.
- Combo: #Storm Cloud. The Meteorologist Miracle gives +10 Storm Cloud out of combat and +4 Lightning Damage at the cost of −30% Max MP — a good trade for a build that leans on the special rather than sustained casting.
- Talents: Endure 5 for the free Foundation tablet, then Wrath for crit, then whatever survives.
- Priority: Anvils above everything. This build does not work until the tree is deep, and anvil availability is gated by stage progress.
What it costs you: it is genuinely dull, and it teaches you very little about the inventory system. Use it to reach a chapter you are stuck on, then build something else.
2. Ilonica's Spirit Staff — the spin build
The most documented build in the community, written up by the same person who maintains the tablet solver.
Weapon: Staff → Ilonica's Spirit Staff, which sacrifices your basic attacks to spray bolt spell charges. Note the trap on this class: the Bolt Barrage path blitzes through your bolt casts and does nothing if you have no bolt spells. Players describe that combination as a genuinely bricked build.
The bag is the build here. The author's own framing is that four core items carry it, at max levels of 3/4/5/5 — and that "not maxing them hurts the build drastically." That is what makes this a grid build rather than a weapon build: you are engineering cells at specific values, not accumulating items.
- Multipurpose Belt — +1 to all three elemental stats per artifact in the top row, up to +6 each. Reserve the top row for it. It also carries #Mystic, which is what gives you the ×2 slot doubling.
- Combos targeted: Guardian 2, Shadow 2, Magitech 2, Ember 2, Glacier 2, Elemental 2, Lake 3 — note how low those thresholds are.
- Talents: Defense/Endure 5 for the run-start Foundation tablet, which this build leans on to establish a baseline row.
3. Fire Blade — the Solar Blade route
Documented in a Chinese-language Steam guide for 火太刀 (fire Blade), and worth understanding because it has a dependency people miss.
Weapon: Blade, into the Solis upgrade family — Solis Iubar, Solis Missio, Solis Cineris, Solis Fracto, Solis Dekri, Solis Braca.
The dependency: the katana consumes Solar Blade charges. It does not generate them. You need the Furnace artifact to produce charges, and without it the whole line is inert. The 太陽劍系列 (Solar Blade series) are artifacts, not weapon upgrades — that distinction is the thing most write-ups get wrong.
Combo: #Solar Blade, supported by #Ember. The Chef Miracle (+5 Fire Damage, +25% Burn extra damage, −15% Total Weapon ATK) fits, as does Ice Blacksmith's opposite if you go frost instead.
Watch the patch note: 1.0.23 fixed Solis Iubar triggering the wrong special above 150 MP. If you are running high MP, make sure you are patched.
4. Ingenuity breadth — the late-game scaling build
Not a weapon build at all. The premise is one number: Ingenuity at level 20 grants +7% Universal Damage Boost per active combo type, raised from 4% in patch 0.10.0.
Six combos at their minimum thresholds is +42% damage on everything, and most thresholds are only 2 items. Twelve tagged artifacts is a normal mid-run bag, whereas getting one combo to level 10 needs ten-plus items of one tag and a lot of luck.
- Talents: Ingenuity 20 first. Ingenuity 5 already gives +2 inventory slots and Ingenuity 10 gives an extra option on every weapon, item and Miracle offer, so the tree pays out along the way.
- Enablers: Fruit Skewer biases which combos appear (6 modifiers, 8 with the Farmer Squirrel costume). Bond Artifacts connect two combos in one item and now drop when one of their combos is active. Chalcedony Key changes its own tag based on placement — a free filler for whichever combo you are one short on.
- Weapon: whichever you have deepest. This build is agnostic.
The trap: breadth only beats depth after Ingenuity 20. Before that, the individual combo bonuses are what you are buying, and spreading thin gets you nothing. This is a build for a completed Destiny Inscription, not a starting one.
What every route shares
Three things are constant regardless of which you pick:
Rush anvils. Weapon upgrades gate on stage progression — skip them early and later anvils can stop appearing entirely.
Max your core items rather than collecting more. A cell's tablet buff sets the artifact's level, and max level varies per artifact, so a +5 cell is wasted on a max-3 item. Preview with Q / E while hovering.
Endure 5 is nearly free value. A Foundation tablet at run start is a whole-row +1 before you have found anything.
How to test a route without burning runs
The Comprehensive Training Grounds (added in 0.11.5) has an anvil next to the guard NPC. You can walk a weapon's entire upgrade tree there. The Journal → Weapons tab shows every path, so you can plan the route before you commit dice to rerolls.
Checked against 1.0.30
None of the four routes changed shape, but four weapon fixes touch them: Superconductor now warns in multiplayer when the special cannot fire for lack of Storm Clouds (1.0.26, route 1); Black Iron Halberd's Tier 2 upgrade effect now actually applies (1.0.26); certain Solar Blade animations now respect the transparency option (1.0.30, route 3); and Flourish Staff continues attacking immediately after a special if you hold the button (1.0.30, route 2). Three routes now have their own long-form pages: the fire Blade, the lightning boomerang spellbook, and the Swift Regret tier 50 tank.
What we will not give you
A tier list. TEAM HORAY has never published one, no community survey exists, and the "easiest / hardest" claims on this page are individual attributed opinions from Steam threads — Great Sword + Storm Cloud repeatedly called easiest, Dagger the subject of a dedicated buff-request thread over its melee range at Hard Mode 30–50. That is sentiment, not data.
We also do not have verified damage numbers for any of these routes. Nobody has published a benchmark, and the community's own damage math for comparable games tends to come with the author rating their own confidence in single digits. Build around the mechanics, which are documented, rather than around numbers that are not.
- Steam discussion thread 'Any tips?' — Storm Cloud greatsword consensus
- SephiriaSolver 'Spin to Win' build guide — Ilonica's Spirit Staff route
- Steam Community Guide 火太刀-太陽劍太刀實戰Build by Esta — fire Blade / Solis route
- Steam announcements 0.10.0 (Ingenuity scaling), 1.0 Update (1.0.19 balance)